Body
Overview
Manage your Webex meetings from your Microsoft Outlook account with the “Cisco Webex Scheduler for Microsoft 365,” after a quick one-time setup of this browser add-in.
Directions
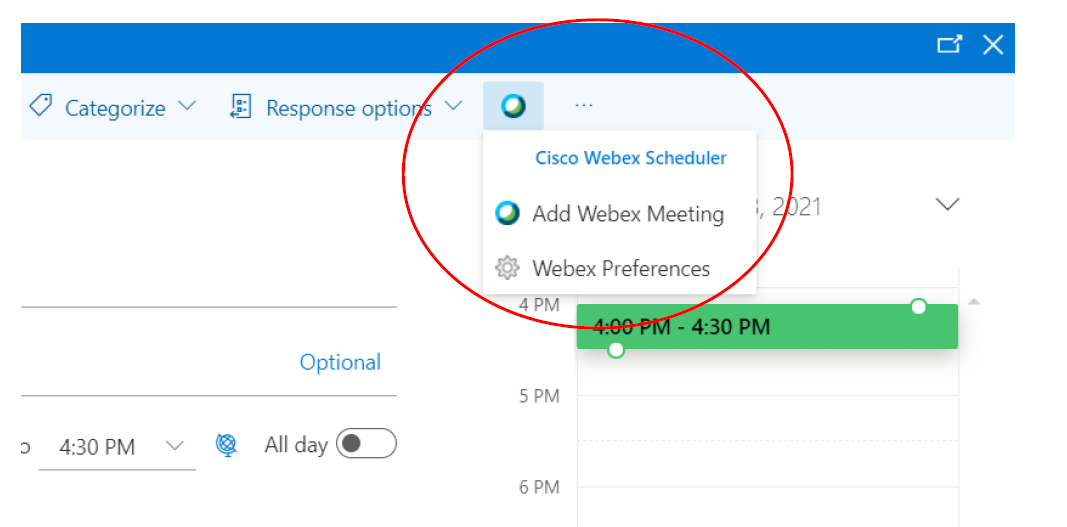
Open Outlook and Locate the Cisco Webex Scheduler Icon
- Open a browser, log in to your Microsoft Outlook account, select your calendar, and then select “New event.”
- From the top-right corner of the New event window, select the Cisco Webex Scheduler icon and then select “Add Webex Meeting.”

2 — Complete a One-Time Setup to Connect Your Webex and Outlook Accounts
- After this setup, you will be able to add Webex meetings immediately after selecting “Add Webex Meeting.”
- At first launch, the Cisco Webex Scheduler will ask for permission to connect your Webex and Outlook accounts; select “Allow” and then “Get Started.”

- Select “flemingcollege.webex.com” and then “Next.”

- Enter your Fleming username followed by “@flemingcollege.ca” and then select “Next.”

- Enter “adroot\” followed by your Fleming username, enter your Fleming password, and then select “Sign in.”

- If you prefer to keep these settings saved on your computer, check the box beside “Don’t show this again” and then select “Yes.”

- Select “Continue” and this one-time setup is complete.

3 — Add Webex Meetings
- You can now add Webex meetings immediately after selecting “Add Webex Meeting.”
