What is FindTime?
FindTime is an Outlook add-in that allows you to quickly find time to meet with others – something that can take weeks without FindTime! FindTime helps you pinpoint times to meet by looking at available free/busy data for your attendees as well as creating a poll where attendees can vote on the times you suggest, and even suggest new times themselves!
When to use FindTime?
FindTime allows attendees to vote on the times you have selected for a meeting to take place in order to build consensus before scheduling the meeting. Meetings can be scheduled automatically once consensus is formed, or manually by reviewing the returned poll data. FindTime integrates with existing free/busy data which makes it quick and easy to select potential meeting times based on availability.
FindTime really shines when you are looking to book a meeting with an external client where you don’t have access to view their availability. Simply select a couple of times that work into your schedule and allow the client to vote on the times that work into their schedule to reduce the back and forth communications generally needed to accomplish this task.
It is recommended that FindTime be used in the following cases:
- Scheduling meeting with an external client(s) where availability information isn’t available
- When voting on meeting times is needed to establish a quorum
- When poll style feedback is necessary to schedule a meeting
In most cases, the scheduling assistant available while booking a new event will remain the easiest option for scheduling meetings directly with internal participants.
Scheduling a meeting in Outlook with FindTime
- Create a new email or select an email to reply to.
- List people required for the meeting in To and optional participants in Cc.
- In the Home tab select Reply with meeting poll.

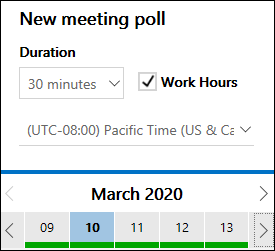
- Select the meeting settings:

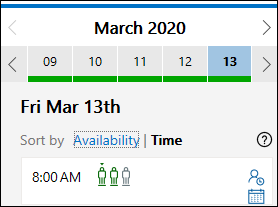
- FindTime looks through the attendees’ schedules (if available) and suggests suitable meeting times.
Note: FindTime uses your Microsoft 365 business account to access your calendar and the calendars of attendees in your organization to determine availability. Calendars that are not associated an Microsoft 365 account are not supported.
Use the links to sort the meeting options.

- Select a few suitable meeting times.
- Select Next.
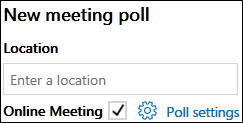
- Enter the meeting location.
- Online meetings are enabled by default. Select the Online Meeting check box to disable it.

When Online Meeting is selected, FindTime will schedule a Skype for Business or Microsoft Teams meeting. FindTime will use whichever has been set by your organization as the default online meeting channel.
Note: If you saved a Skype for Business setting in your dashboard, FindTime will use that instead of Microsoft Teams. If you want to use Microsoft Teams, delete the Skype for Business setting in your dashboard.
- Select Poll settings and toggle the ON/OFF options.
Note: You can still delete selected meeting times at this point by selecting X in the Selected times list.
- Notify me about poll updates: You’ll receive an email each time an attendee votes. The message includes the current poll status and an option to schedule.
- Schedule when attendees reach consensus: A calendar event is automatically scheduled if all required attendees have voted in favor of a specific time option. If multiple options are available, the earliest option will be scheduled.
- Hold selected times on my calendar: A tentative event is placed on your calendar for each time option you propose. All holds are removed when the meeting is scheduled or the poll is canceled.
- Lock poll for attendees: Attendees will not be able to suggest new times or edit other attendees.
- Require attendees to verify their identity: To help prevent anonymous voting, attendees will be required to authenticate before voting.
- Email notifications in FindTime language: The language that you use FindTime in will be used to send related email notifications. Otherwise these notifications will be sent in English.
- Select Insert to email.
- FindTime inserts the suggested meeting times into your email. Select Edit Options to change the meeting settings, if necessary.
Note: If you make changes and reinsert the meeting times, you need to manually delete the original invite.
- Select Send to send the meeting invites and start the voting process.
-
You will receive a direct link to the voting page for your meeting.
This article is provided by Microsoft Support.